The Preview step (⌘3 / Ctrl+3) shows the result: the exact toolpaths TessaFab will write, not an approximation. If it looks right here, it will print like this.
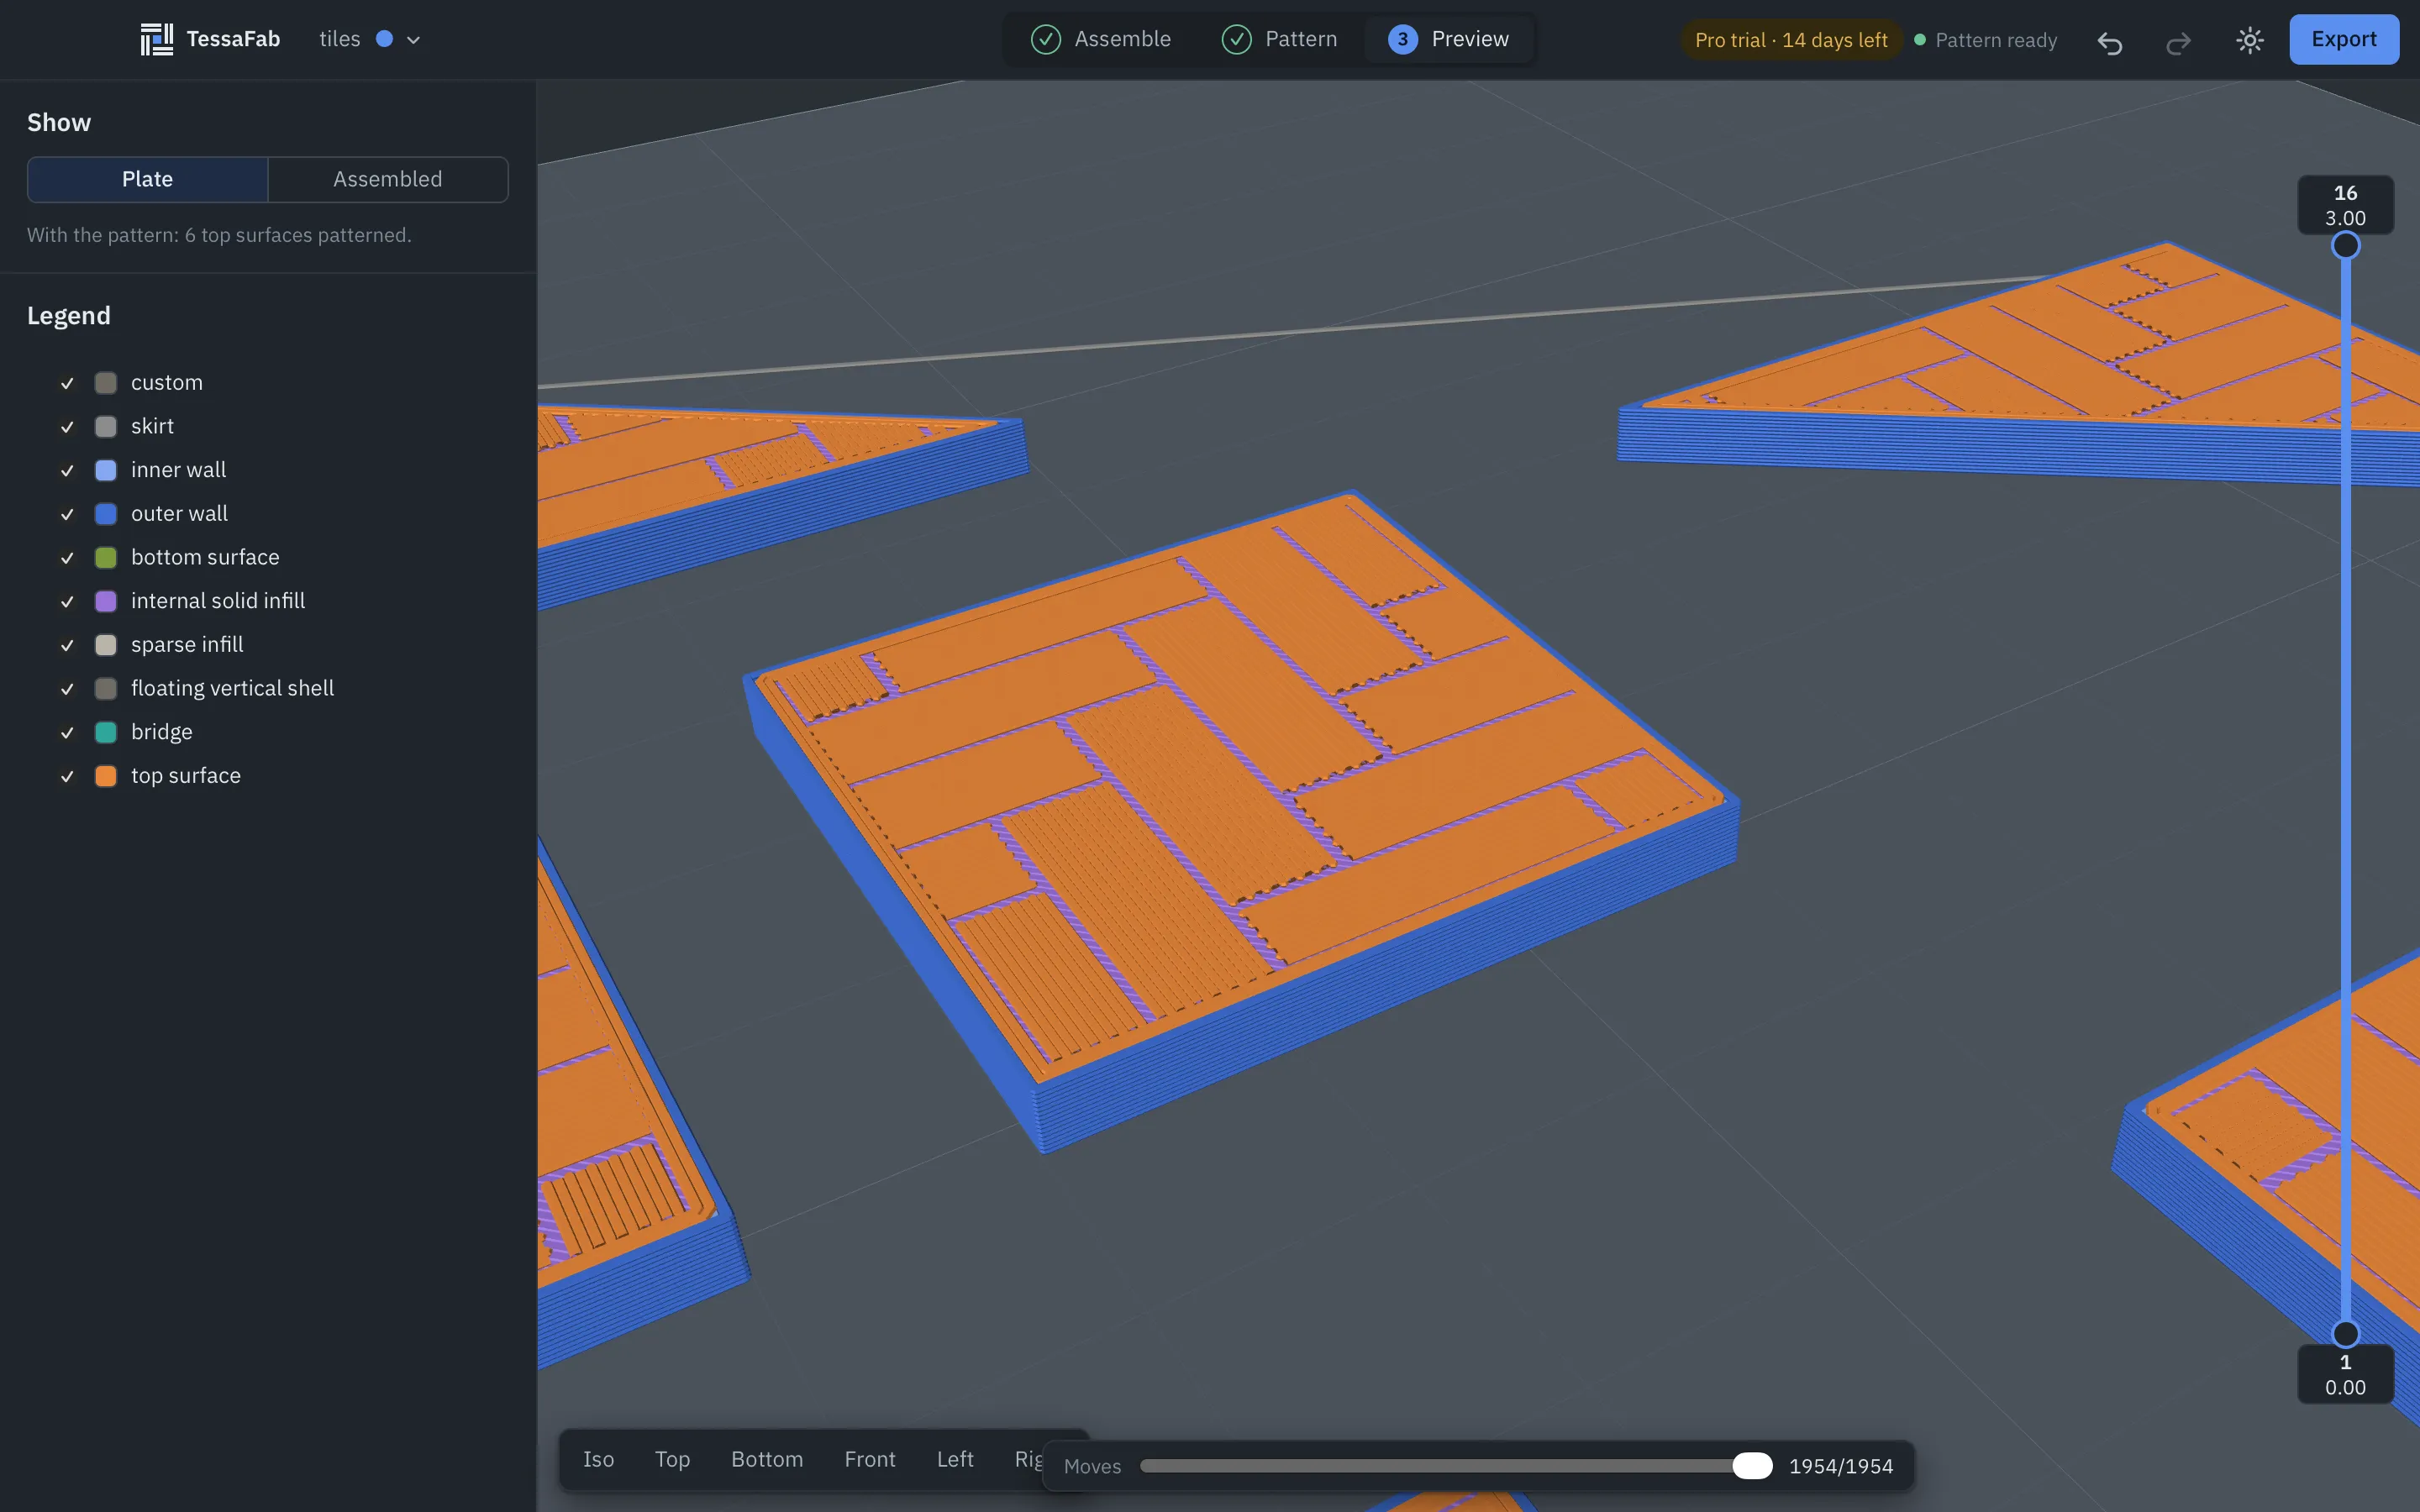
Show
- Plate shows one plate as it sits on the bed. With several plates, choose one from the list.
- Assembled shows the pieces in their assembled places, so you can check the pattern across the seams.
The line under it says how many surfaces were patterned.
Look around
- Drag to orbit, scroll to zoom. Iso, Top, Bottom, Front, Left and Right (or 0–6) jump to a view.
- The slider on the right shows a range of layers: drag its ends, or press ↑ / ↓ (with Shift: five layers).
- Moves, along the bottom, plays the toolpaths in order within the top layer shown: drag it, or press ← / →.
- The Legend colours each kind of line as your slicer does (walls, infill, top surface and so on). Untick a kind to hide it.
What to look for
- Every surface you wanted patterned is patterned (a surface the engine couldn’t pattern is kept as sliced, and the log says why).
- The pattern lines up across seams in Assembled view.
- Narrow areas: tiles narrower than about 1 mm get few or no lines.
Before trusting a pattern on a long print, print a small test part.